


My watercolor paintings appear really intricate—and they are. Editing my photograph reference, drawing the composition onto my floor, masking very small parts and including the remaining detailing is meticulous do the job. Most of the multicolored texture results, on the other hand, are designed with poured or spattered paint.
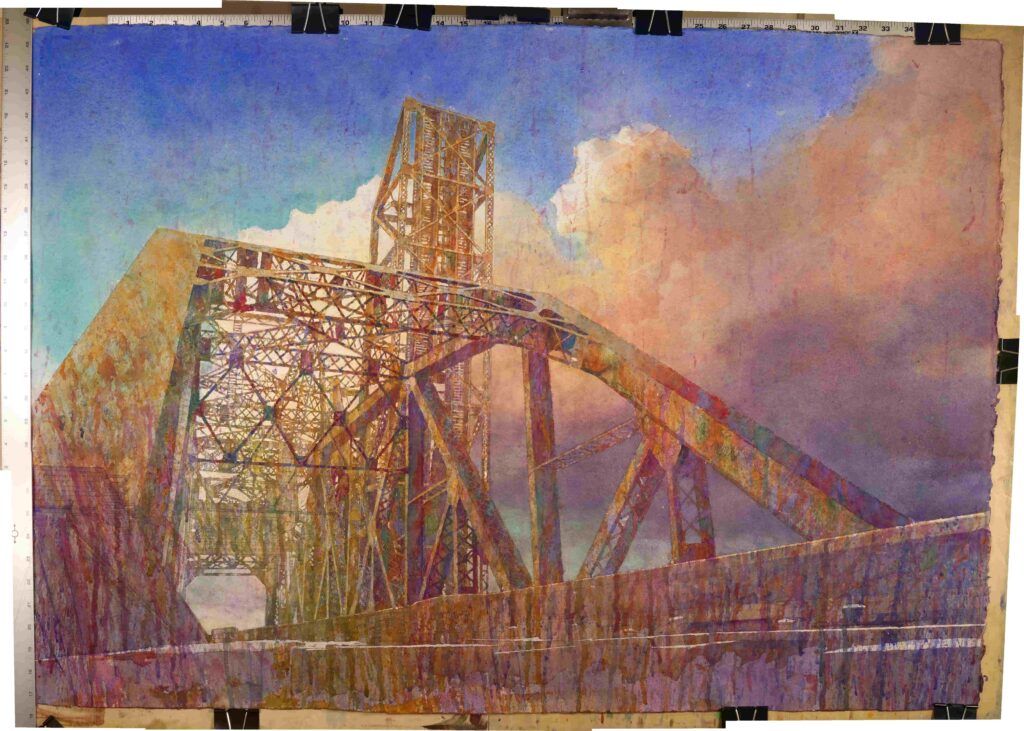
Here’s a demonstration of how I created St. Charles Airline Bridge No. 2.
Step 1
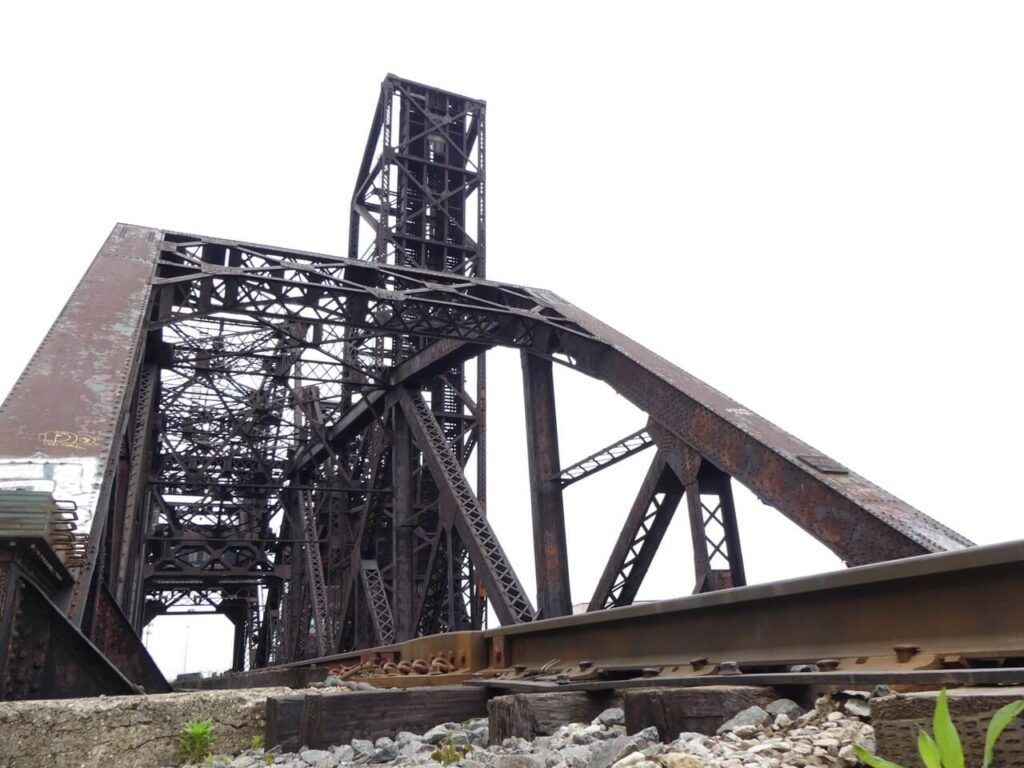
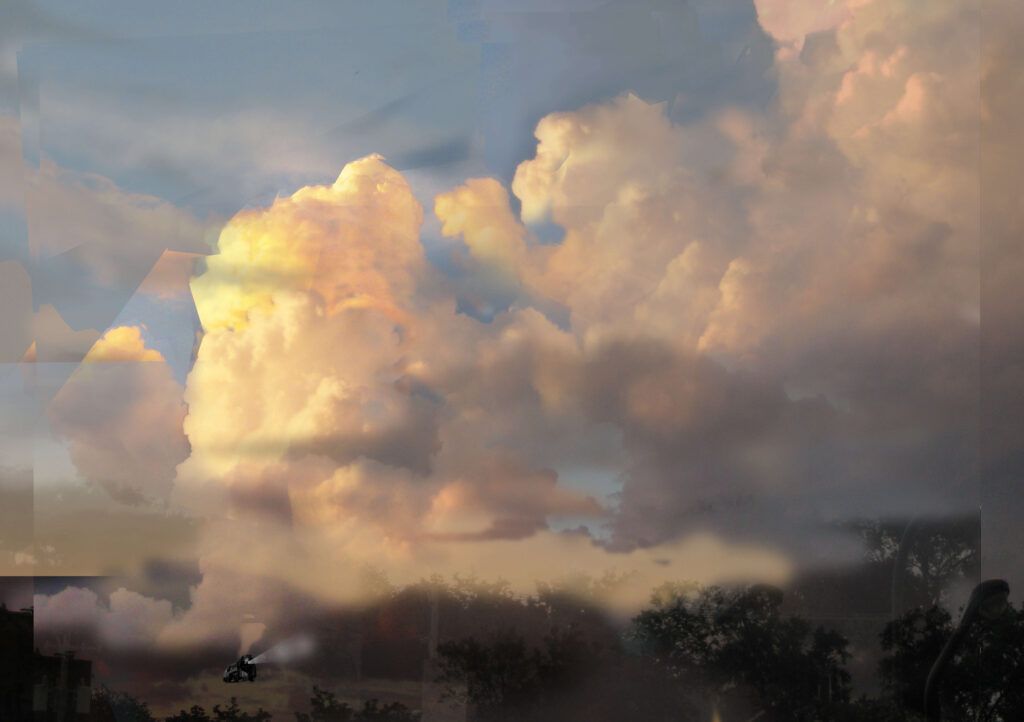
I loved this perspective of the St. Charles Air Line Bridge, in Chicago, but the sky in my reference image was the basic white of an overcast day.
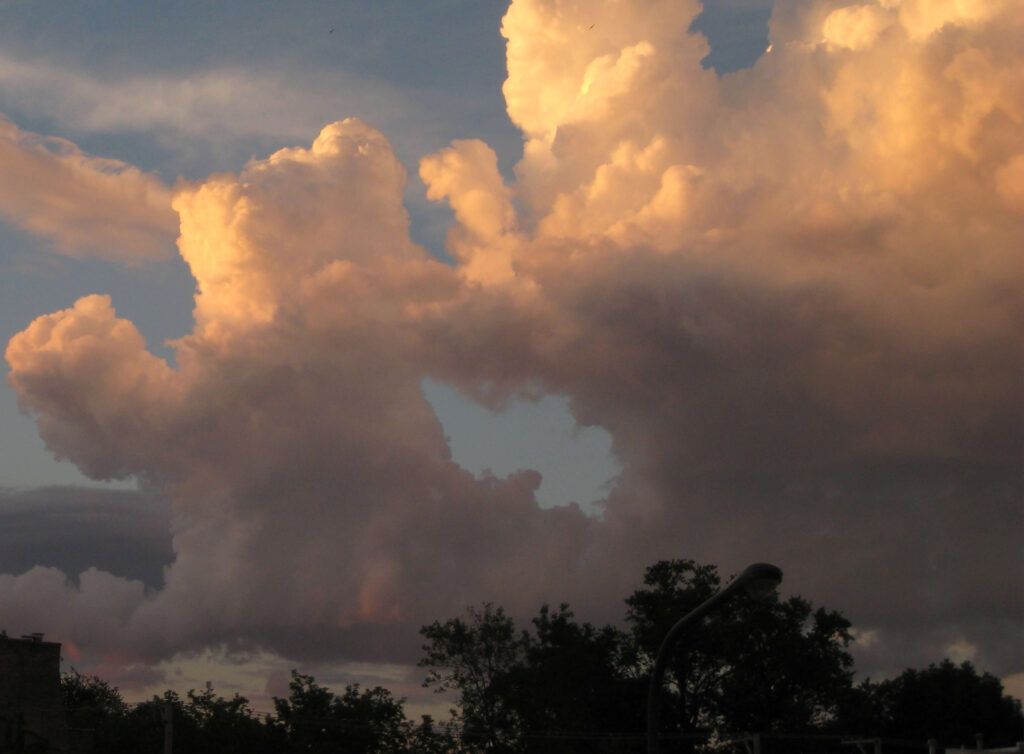
To include drama and spotlight the lacy metal structure, I selected an more image of a cloudscape.
Action 2
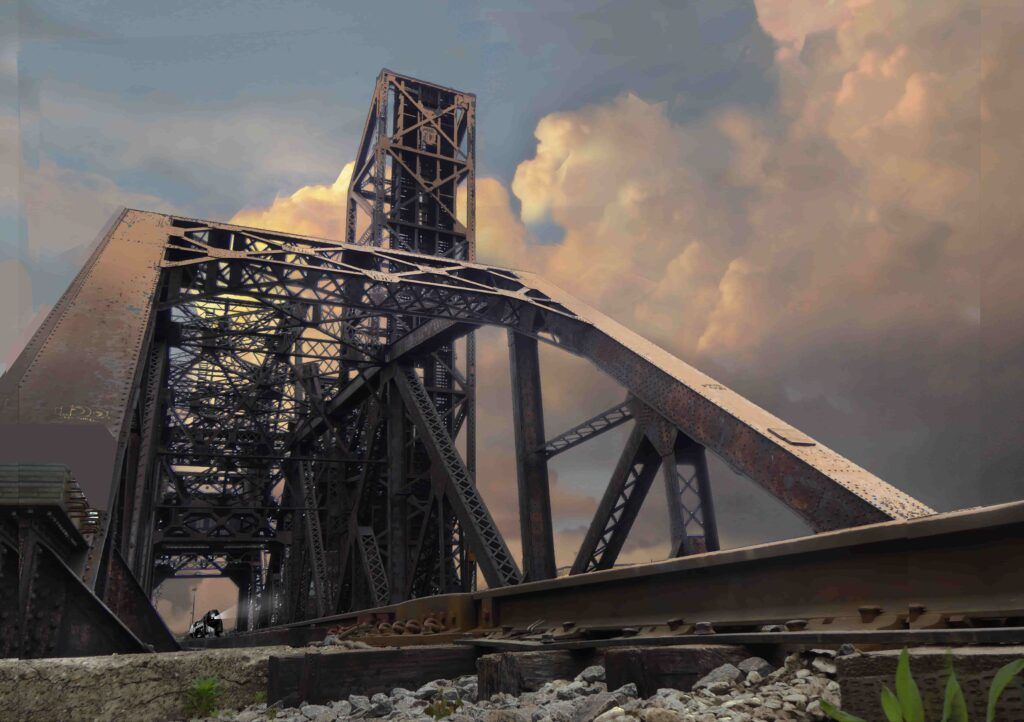
I used Adobe Photoshop to combine the replacement sky photograph with the bridge photograph and generate far more distinction between the bridge and the sky.
Here’s how I attained this in Adobe Photoshop:
- In the navigation, I selected Decide on > Coloration Selection and chosen the white regions of the sky.
- I returned to Select, this time picking out Inverse in the dropdown record. This reversed my variety from the sky to the bridge.
- I cut and pasted the bridge into its personal Photoshop layer. This authorized me to slide the sky photograph into the layer underneath the bridge picture, the place I proceeded to rotate, resize, and invert the clouds until finally I ended up with an impression I appreciated.
Because the bridge presented a substantial-distinction, really hard-edged picture, isolating the bridge working with Color Variety and Inverse was straightforward. It’s a lot much more difficult to use this method efficiently when pictures have numerous spots of identical values and murky edges.
In these cases, I use the Polygonal Lasso instrument. It makes it possible for you to define any condition, which can then be copied and pasted into a new layer where it can be moved or manipulated. Outlining in-depth locations with the Polygonal Lasso instrument can consider some tolerance, but it pays off in the conclude.
Associated: Composing a Photograph Reference With Photoshop
Step 3
With my modified reference impression complete, I was ready to start my watercolor portray.
I made use of painter’s tape and masking fluid to preserve the lightest regions of the sky. To hold the washes clean, I poured diluted paint from minimal plastic cups. Future, I manipulated the washes with my fingers and a significant hake brush. My main aim was to preserve the paint moving slowly but surely so the sediment wouldn’t settle.
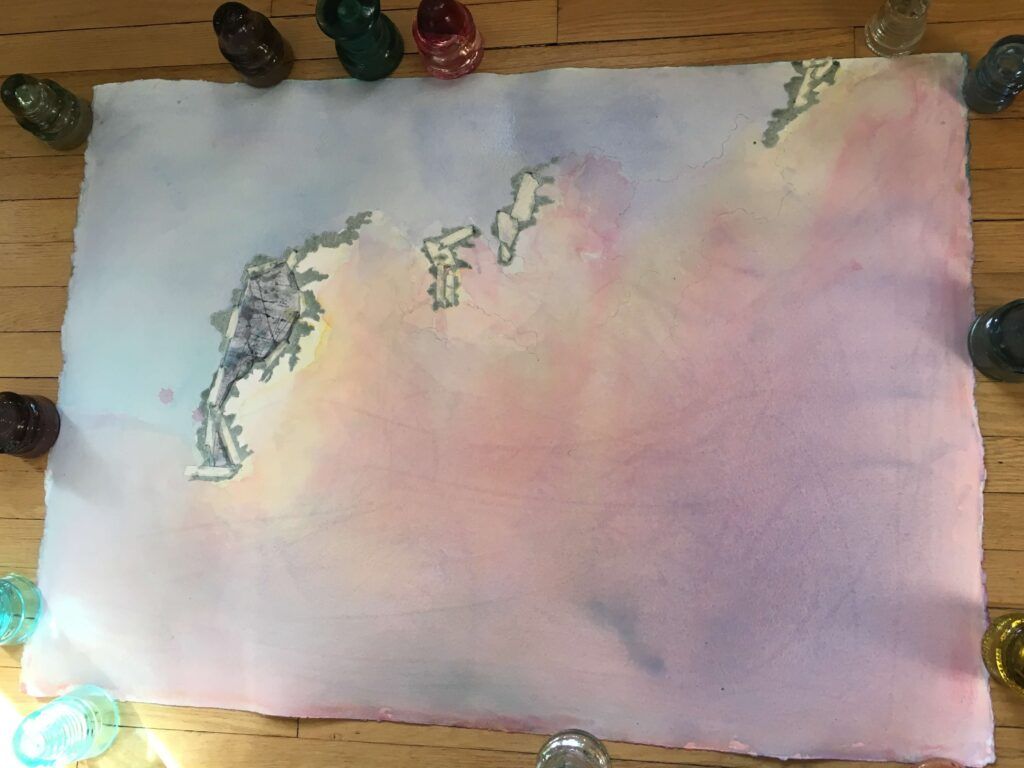
I used 5 to 7 washes, making use of these Daniel Smith colours:
- Hansa yellow medium
- Quinacridone coral
- Ultramarine blue
- Amazonite legitimate
I applied far more blue in the upper sky and more coral and yellow in the clouds. Among each individual wash, I waited for the paint to fully dry.
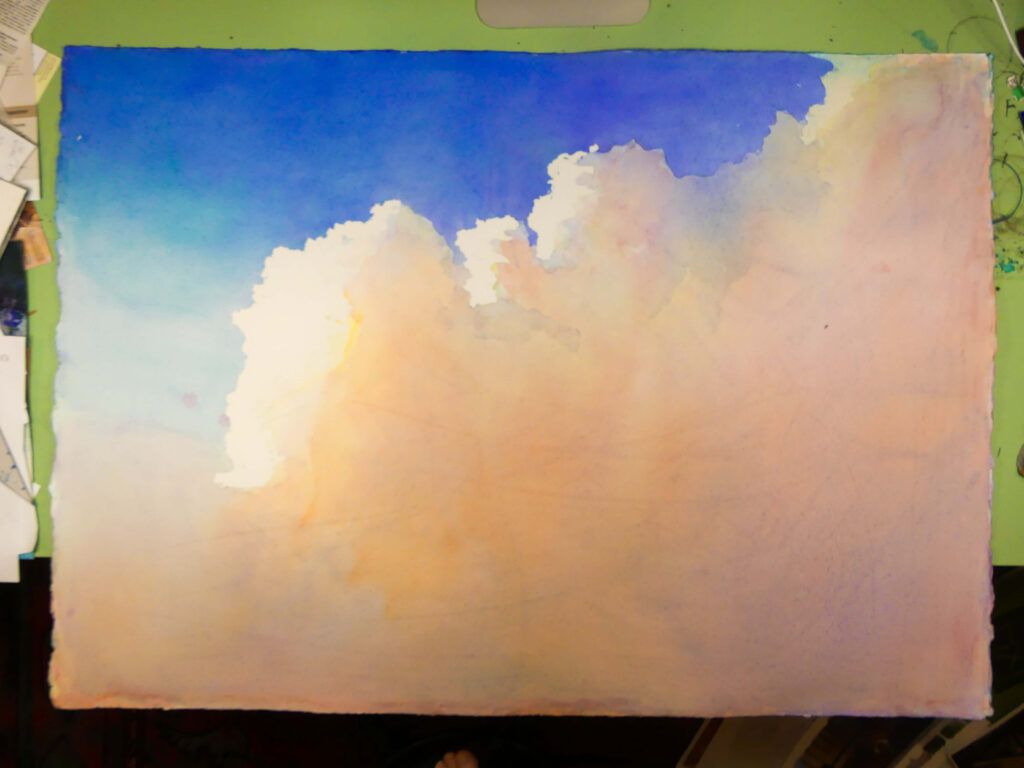
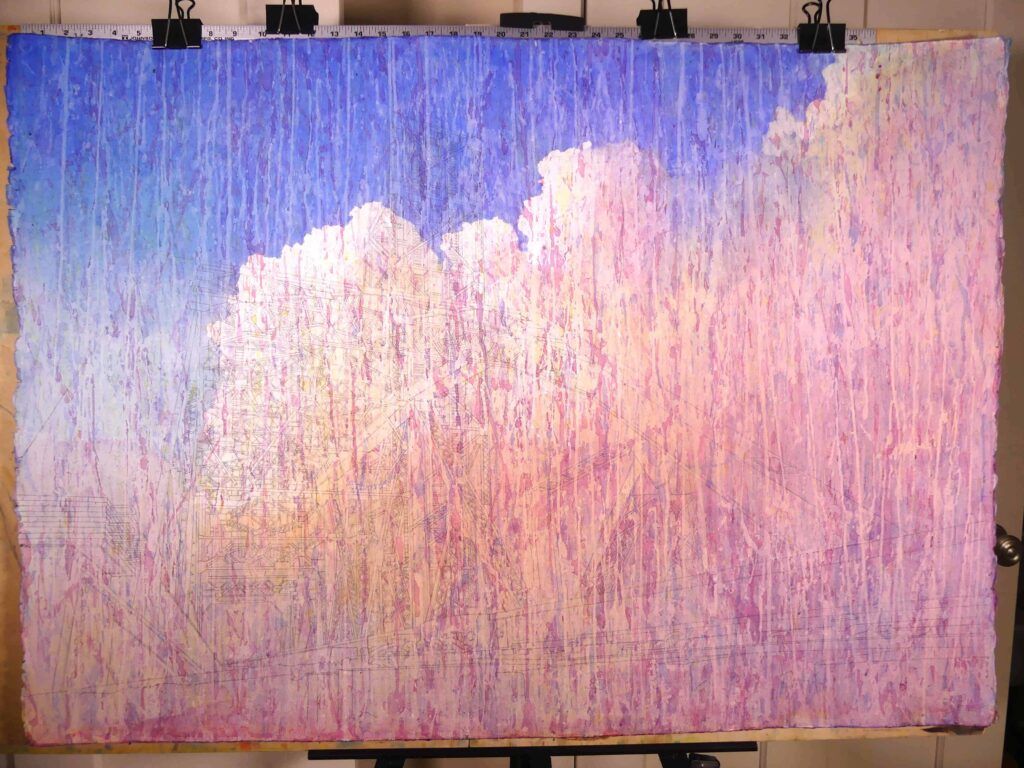
Step 4
When I was glad with the sky, I started off developing vertical texture by splattering masking fluid and paint. To do this, I clamped the paper to a board and placed it at about a 45-diploma angle towards the back again wall of my studio. I then threw masking fluid at the paper with a toothbrush, letting the mask to flow downward.
Future, I threw on diluted paint, just one color at a time, utilizing a No. 22 Escoda Versatil brush in the identical way as I’d made use of the toothbrush. I permitted every single layer of colour and mask to dry thoroughly right before introducing yet another layer.
For the initial layers of thrown-on paint, I used diluted mixtures of Hansa yellow medium, quinacridone coral, and cobalt blue. I find that using more transparent, much less granulating paint makes it possible for for a lot more transparent layering.
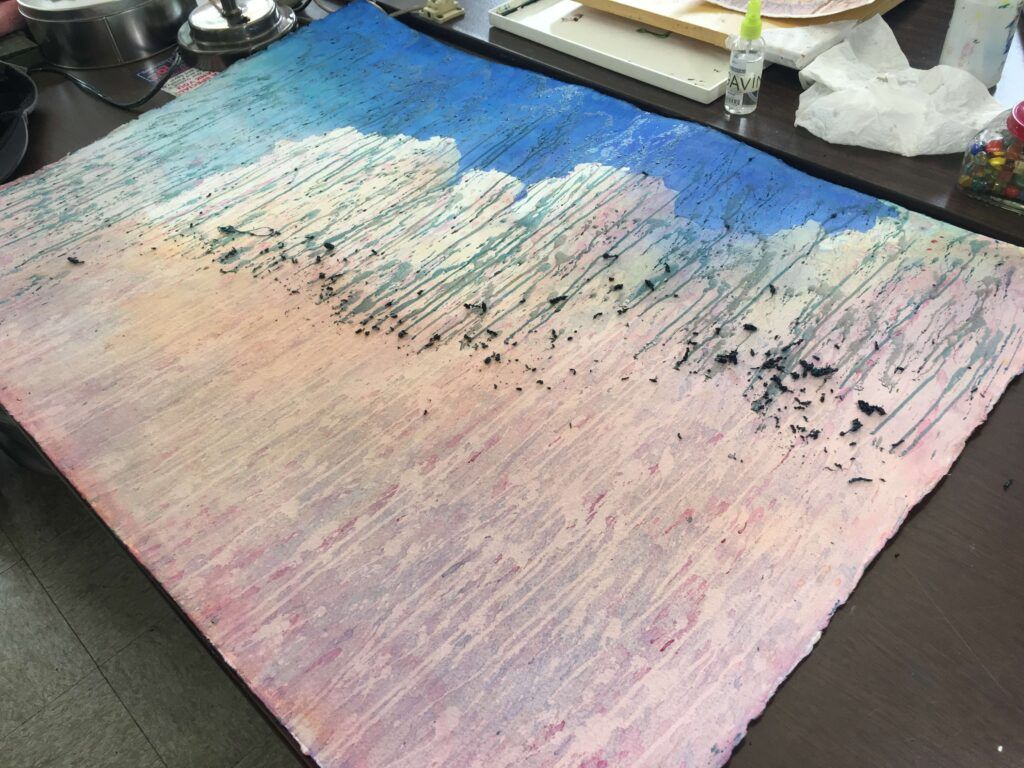
Stage 5
Having accomplished the preliminary levels of thrown-on paint, I made a drawing of the bridge on a individual sheet of paper. Then, positioning graphite paper beneath my drawing, I traced together the traces, transferring them on to my painting.
Stage 6
Up coming up: masking the sky. To deal with the much larger regions, I utilized translucent painter’s tape alongside with items of paper. I left a small hole involving the tape and the bridge edges, which I then crammed in with masking fluid so the paint would not creep underneath. I employed a Low-priced Joes Uggly brush to mask big places of sky and a ruling pen for the far more thorough masking inside the bridge’s framework.
Filling all the modest holes of this lacy structure with masking fluid took some concentration.
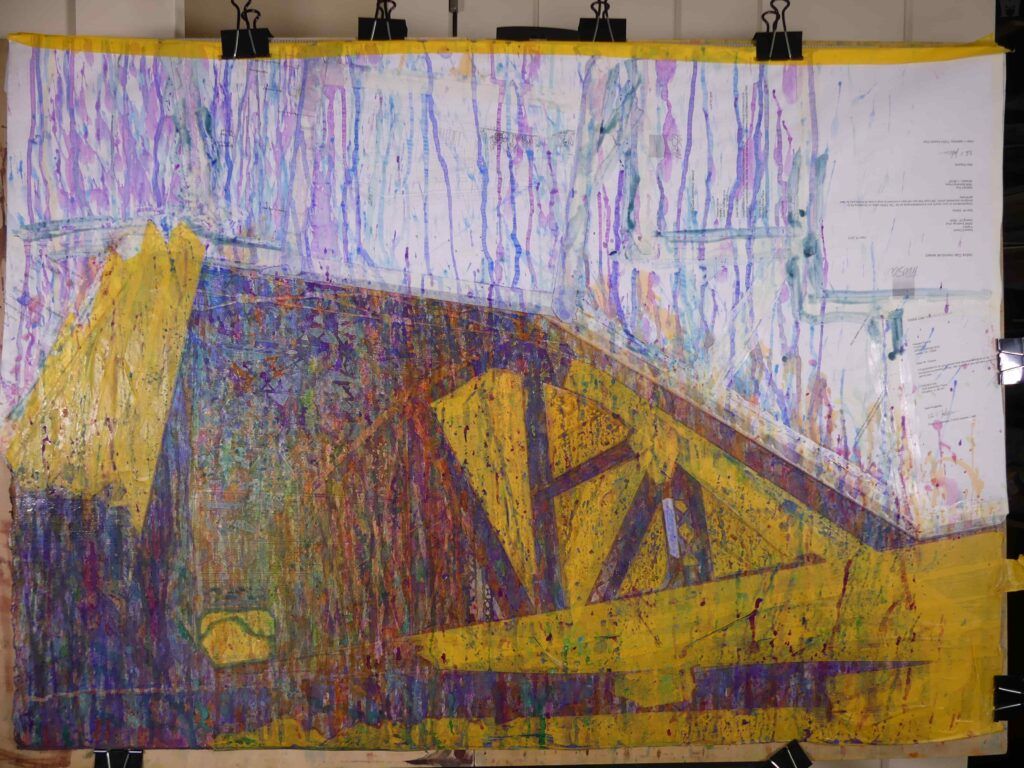
Subsequent, I threw extra paint at the paper, applying quinacridone sienna and outstanding orange to create the rust colour, along with ultramarine blue, Hooker’s eco-friendly, and amazonite real. I permitted just about every shade to dry just before applying the up coming.
Move 7
The moment I’d utilized the basic texture on the bridge, I started to fantastic tune by introducing paint in darker places and scrubbing to lighten others. To lighten precise regions, I reduce out a stencil working with masking tape and an Xacto knife. When the stencil was developed and placed on the painting, I brushed water onto the region with a tender brush.
After letting the drinking water sit for 20 seconds, I dabbed the space with a paper towel. In overworked regions, I scrubbed all the way back to white with a toothbrush and commenced in excess of.
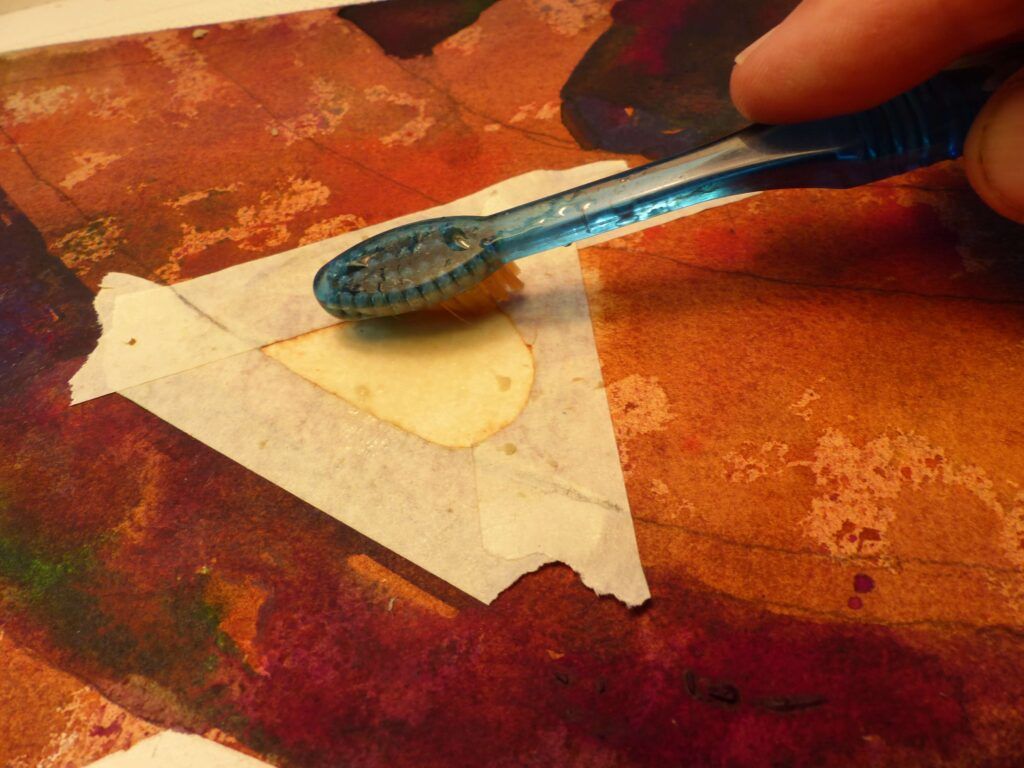
To darken, I also used the stencil system to produce a mask for splattering additional paint. Good tuning can take 80 % of my portray time.
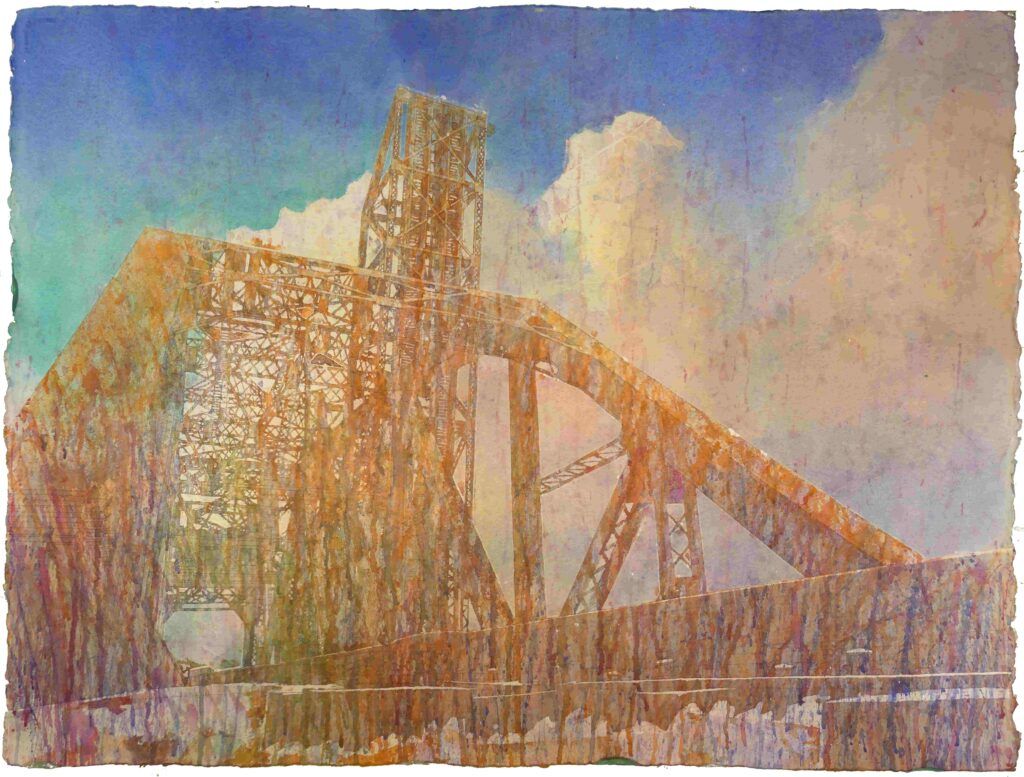
Move 8
Listed here is the completed portray.
Similar: Peter Jablokow and His Nostalgic Matter Make a difference
Verify out the Summertime 2022 Watercolor Artist for a creative imagination workshop by Peter Jablokow, where by he shares reference image guidelines to assistance you create dynamic compositions for your paintings.
About the Artist
A experienced architect, Peter Jablokow begun migrating toward art by turning into an architectural illustrator. He is now an award-successful artist and a signature member of American Watercolor Modern society, National Watercolor Modern society, and Transparent Watercolor Culture. He is posted in Splash 15, 16, and 17, an once-a-year watercolor compilation, and has exhibited in a lot of group and unique reveals and fairs. He teaches watercolor in group and personal lessons.


