


If I had to select a single artwork medium for the relaxation of my existence it would be fibers. I am normally drawn to them, even from an early age when I only preferred to have on corduroy trousers due to the fact I could run my fingers across the grooves and make a neat seem. My emphasis as an art big in college or university was textile structure, and in my creative career around the earlier 30 several years I have begun a children’t clothing business, a quilting business, and there is not one particular wall in this residence that does not have one of my home made material banners (hold out right up until you see my up coming publish!). I am expressing all this to inform you that I ultimately experimented with doodle weaving and I want to do practically nothing else all working day every single working day!!

The best aspect is that there are truly no problems to be made… just experimentation and color exploration. And you scarcely require any materials, and there is no mess, and you can choose them on a excursion, and young children as young as four can make them way too. So a lot of good reasons to makes one! Do you want to give it a try out? Okay, fantastic. Allow me show you how it is carried out.
Materials Necessary for Doodle Weavings:
~ Piece of cardboard for the loom (mine is 10.5″ X 6.5″)
~ Scissors
~ X-acto knife
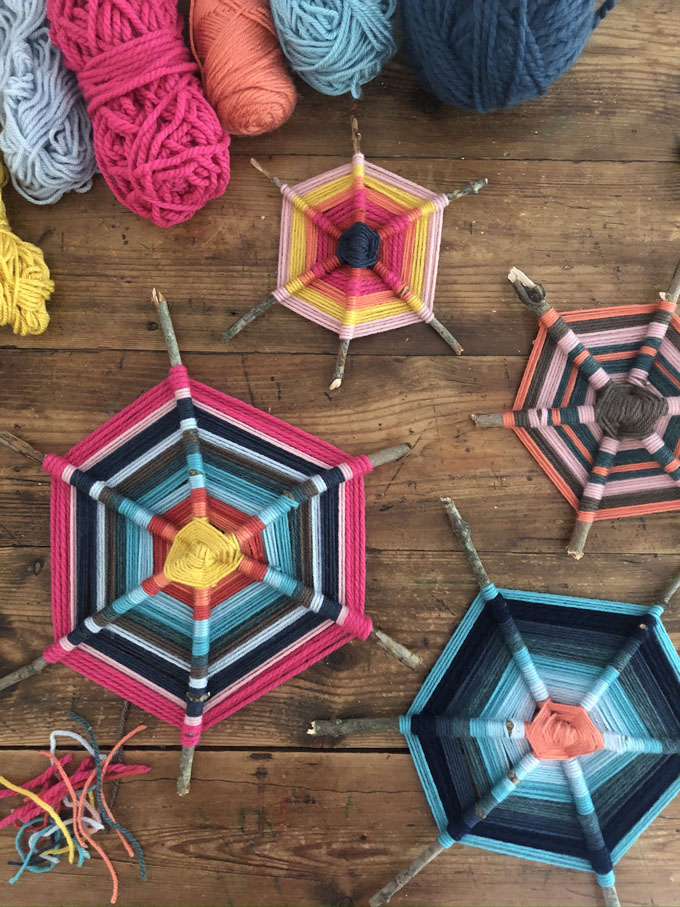
~ Yarn in a variety of weights and colours
~ Plastic lacing needle or masking tape
~ Stick
~ Fork (for pushing down the weft so it suits snuggly together without gaps)
How to Make a Doodle Weaving:
1. Initial, make the cardboard loom.
Action 1: Minimize a rectangular piece of cardboard, I transpired to already have a piece that was 6.5 inches wide and I slash the length to 10.5 inches.
Step 2: Fold the ends up about 3/4 of an inch. You’ll need to have to “score” the back with an X-acto knife and then bend it up. This indicates you minimize a shallow line at the issue wherever you want to bend it on the opposite aspect to assistance bend in a straight line.
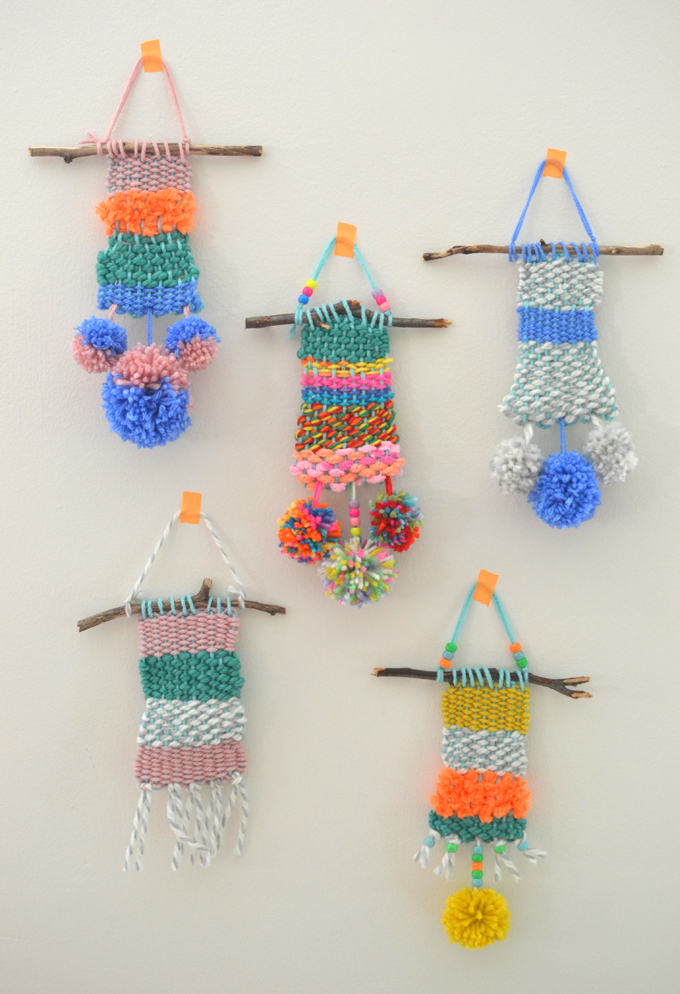
Move 3: Lower an even quantity of slits with scissors on either conclusion for the warp (which is the stationery yarns that go up and down). I manufactured 16 slits for the reason that I required my warp to be restricted. But if you are utilizing a whole lot of large, thick yarn or executing this with tiny children then possibly you want to do 12 slits. You can see these rainbow weavings that we did in art camp for a loom with 12 warp threads.
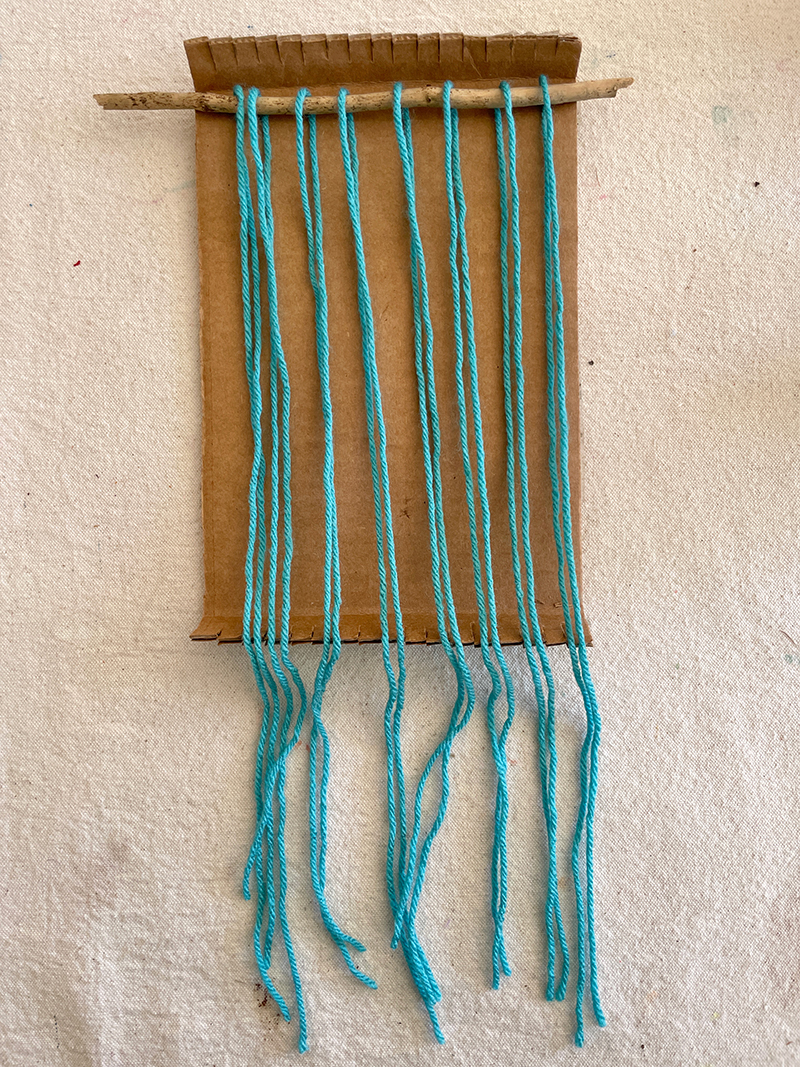
2. Connect the warp.
Move 1: Slash one particular warp yarn for every single two slits. I cut 8 very extensive items. Each and every yarn should really loop all-around the top rated and hold down at the bottom to generate the fringe.
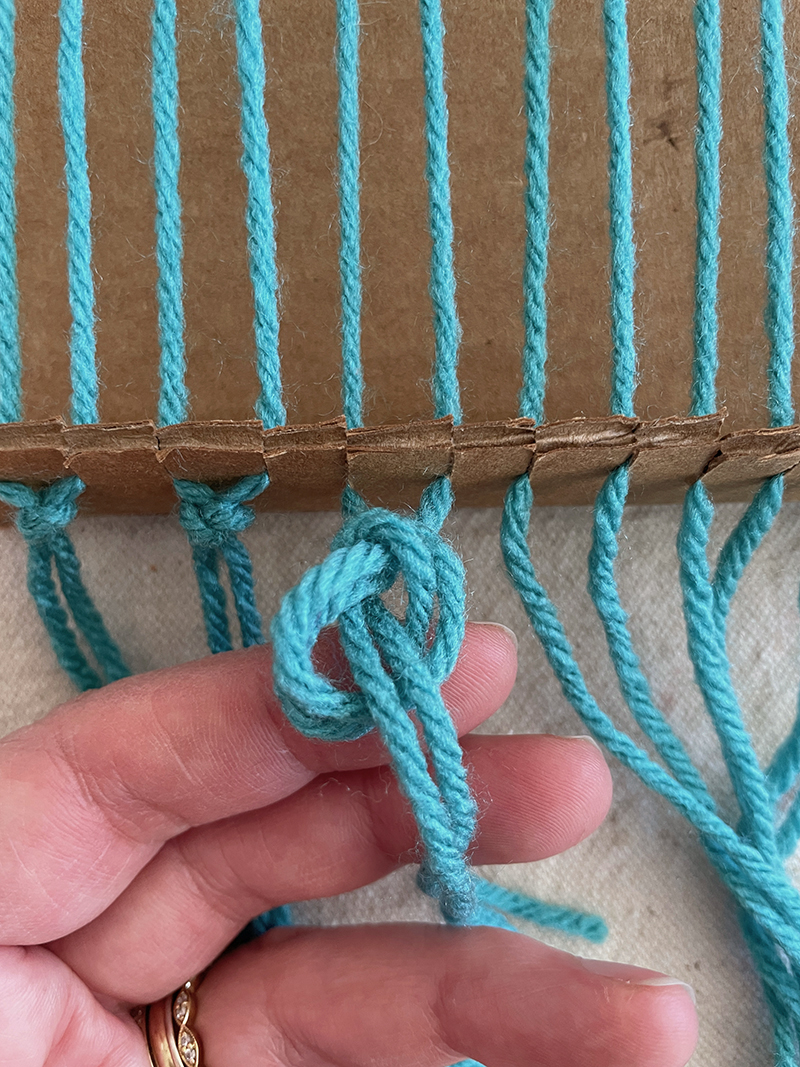
Action 2: Double-knot the top rated close to the stick, over the loom, then press the yarn into the slits.
Phase 3: Press the other stop of the yarn into the bottom slits and then pull so the tension is not too loose and not to restricted, but generating positive stress is equivalent with all warp threads.
Action 4: Tie knots at the base to build the fringe. Really don’t trim the fringe still, wait to do that at the finish.
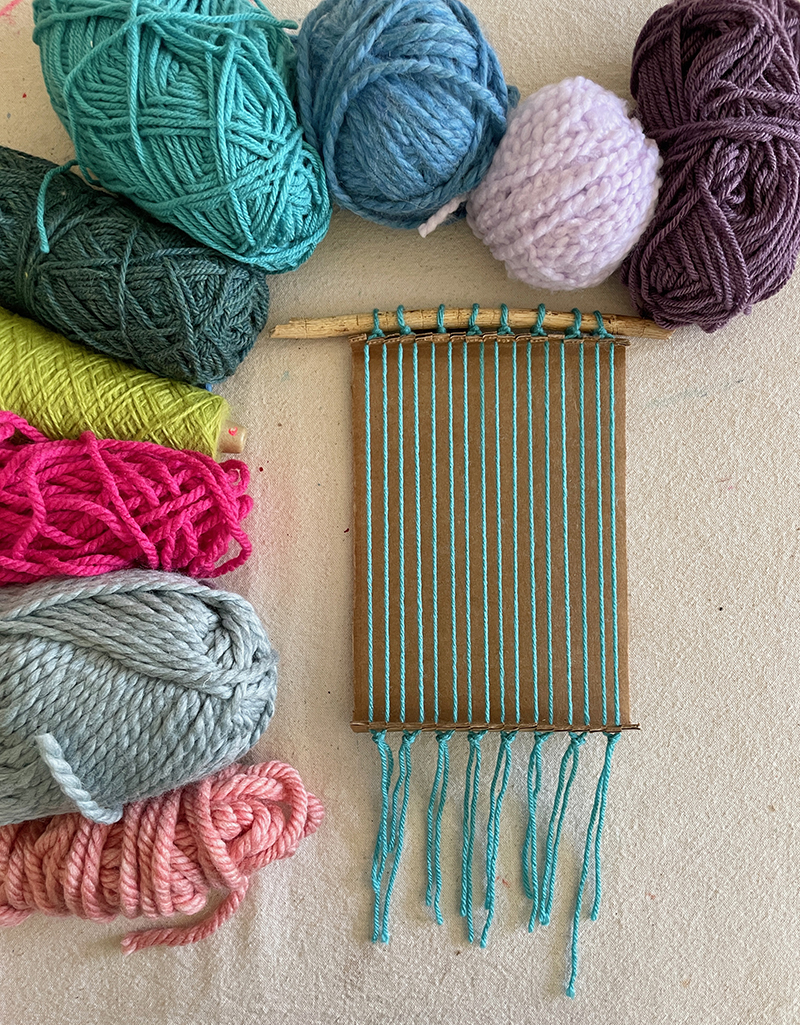
3. Start out your weaving.
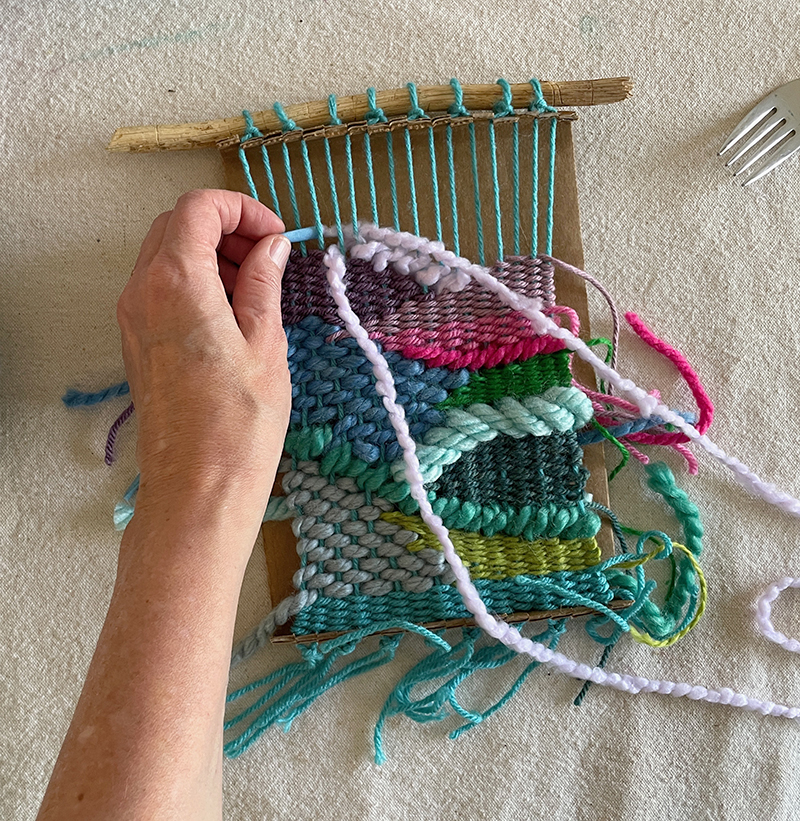
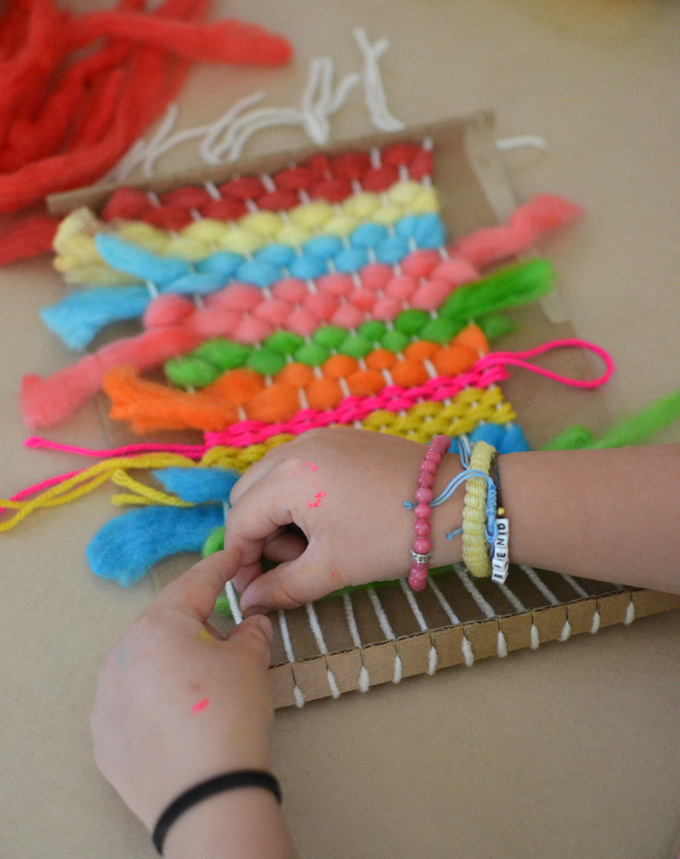
Move 1: Select your weft colours (the yarns that go across) and pick 1 shade to start. If you have a needle, excellent. If not (I couldn’t obtain mine) you can tape the conclude of the yarn like a shoelace which can help weave by way of the warp.
Stage 2: Beginning at the bottom, weave a handful of rows just straight across. If you’ve never ever performed weaving before, get a glance my weaving with little ones post which explains in detail how to weave. It is in essence just about and underneath, then back again throughout in the reverse around-beneath sample. It is not tricky, but it can be straightforward to drop a warp thread or neglect to change sample on the way back. So just after each and every run as a result of, use your fork to thrust down the weft and eyeball that matters seem excellent. And keep in mind to be cautious not to pull the yarn too tightly on both facet. This will distort the weaving. Youthful little ones do this most of the time, but you can train them to watch out for that.
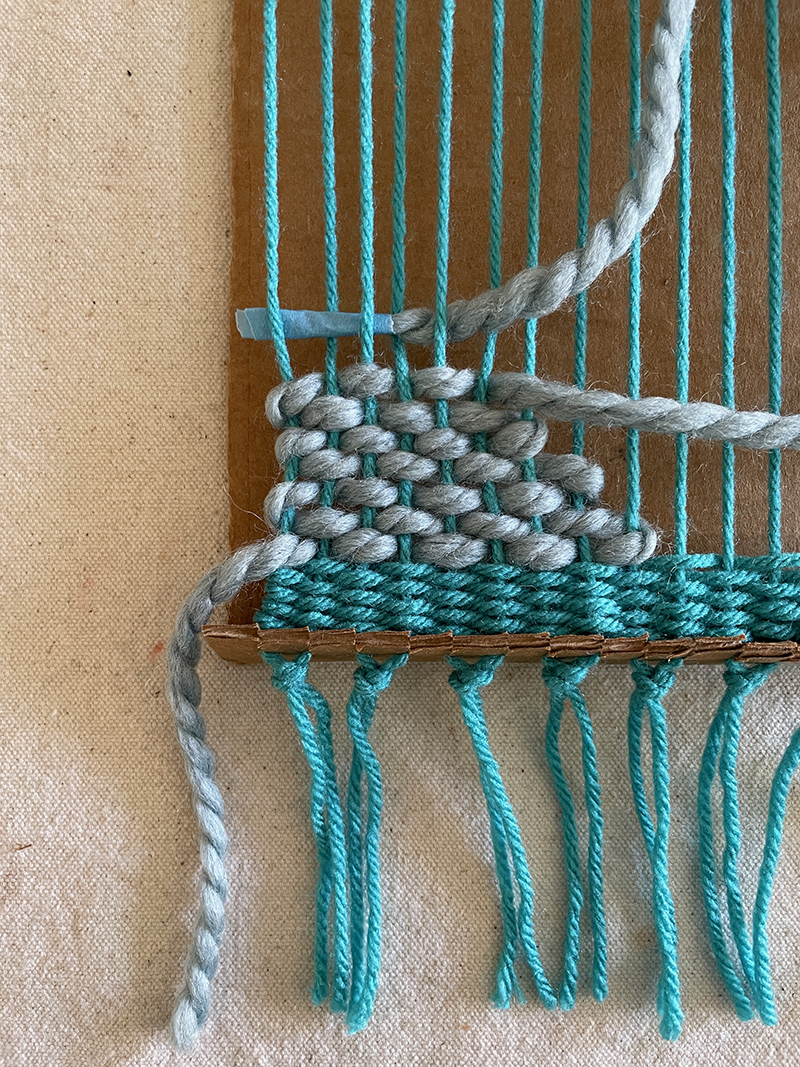
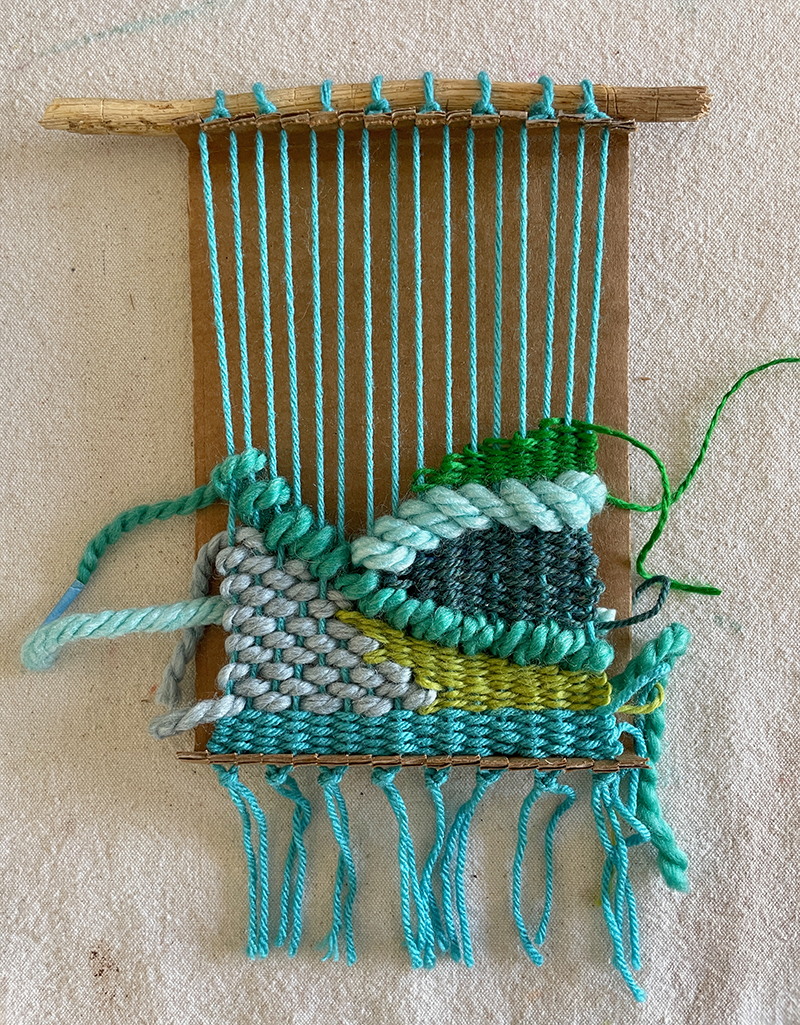
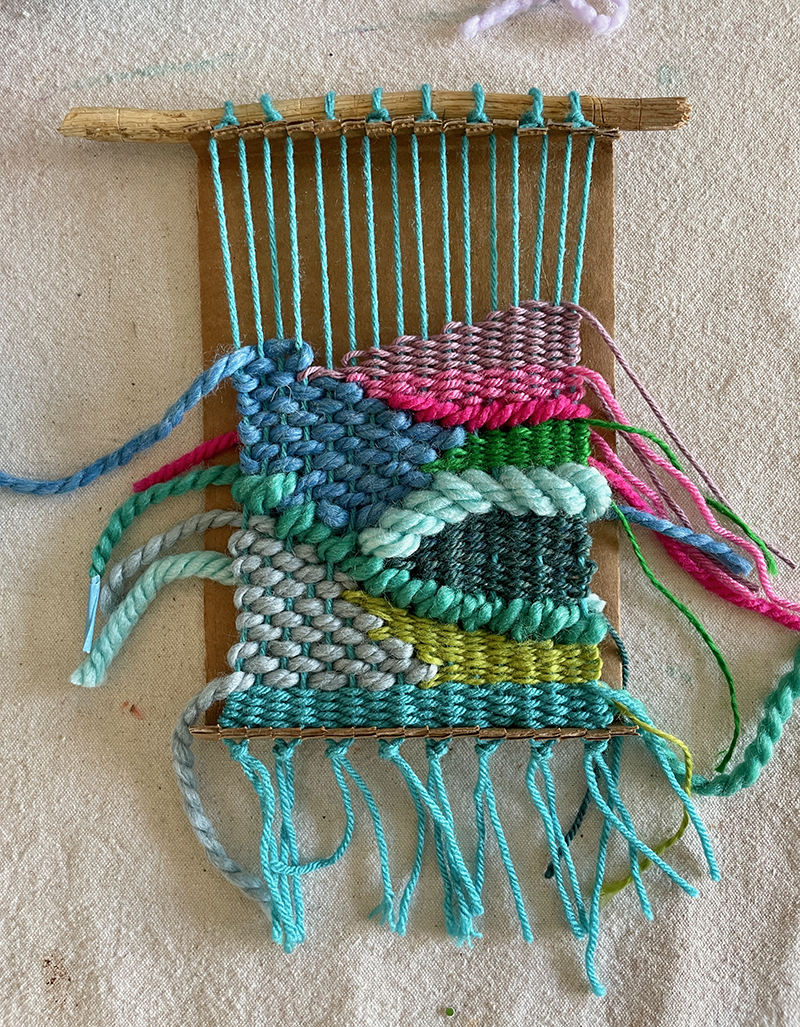
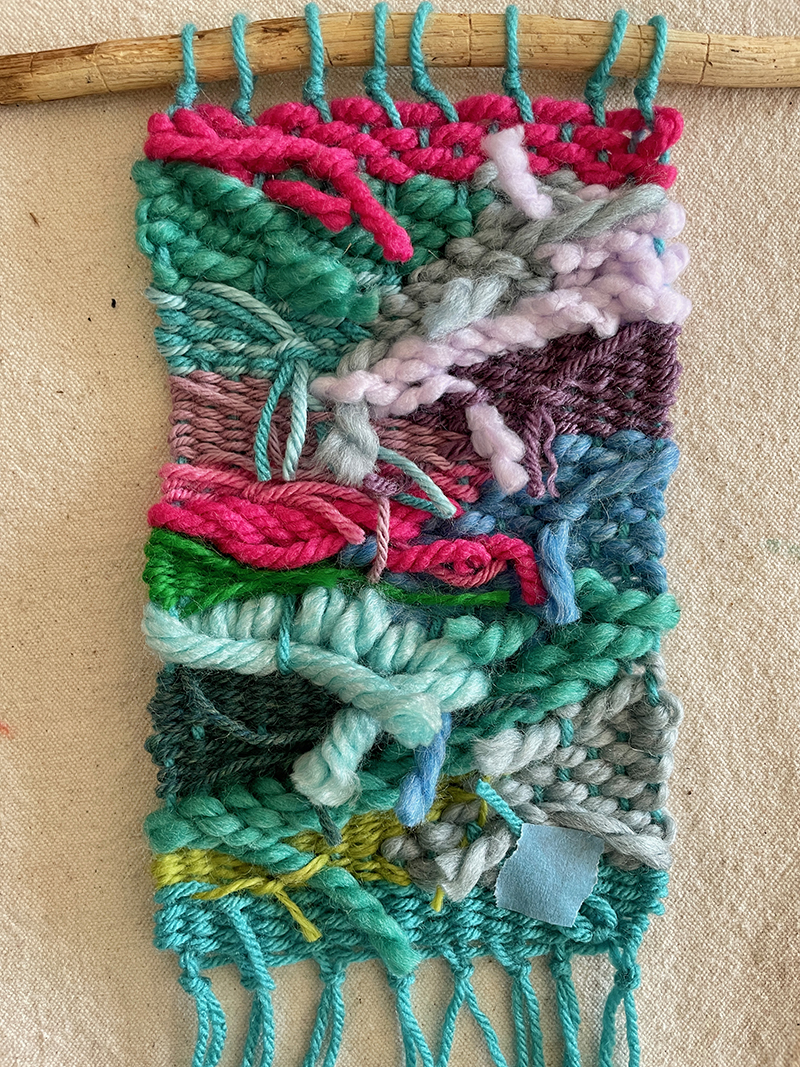
Action 3: Just after you have a number of rows on the bottom, you can start off “doodling” with various yarns. Get started any place and just make a form. I was loosely pondering of mountains when I built this which helped in my doodling.
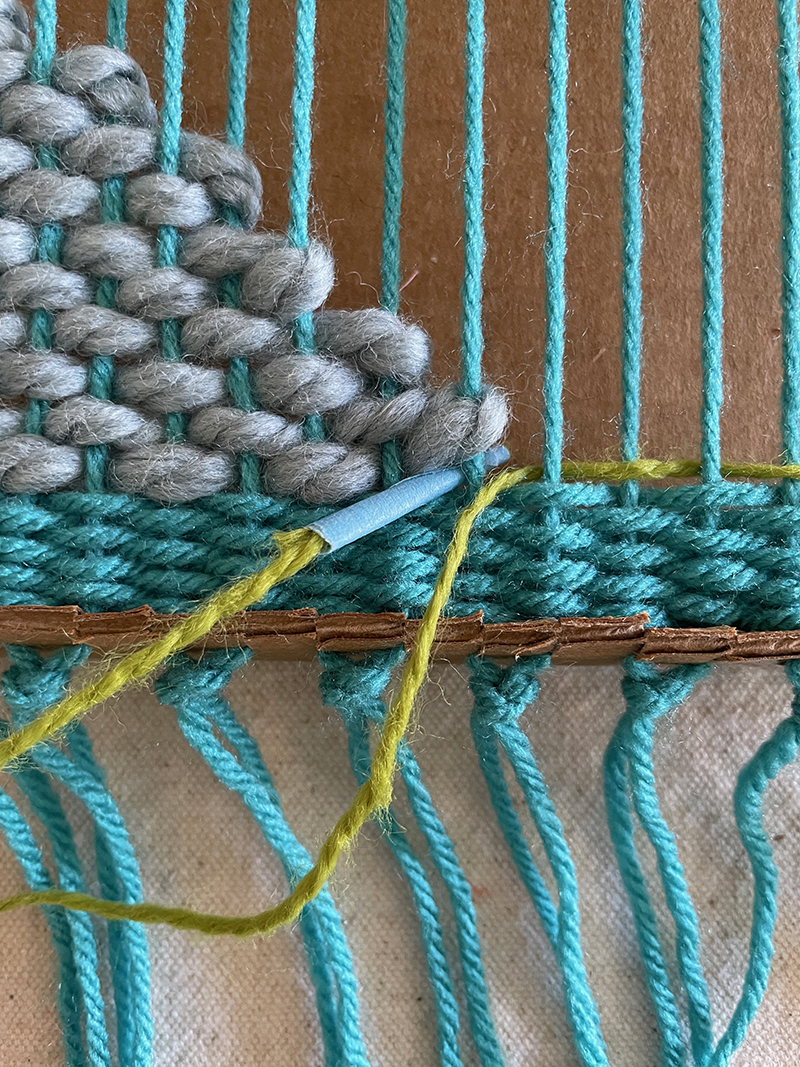
Step 4: When you are ready for the subsequent colour, just start out following to the final colour, even if you’re starting in the center. To avoid gaps in the weaving, make confident that the up coming color is woven more than some of the exact same warp yarns that the last coloration used. But if you do locate that there are gaps at the stop, you can also just go again and fill them. This is doodling, so something goes!
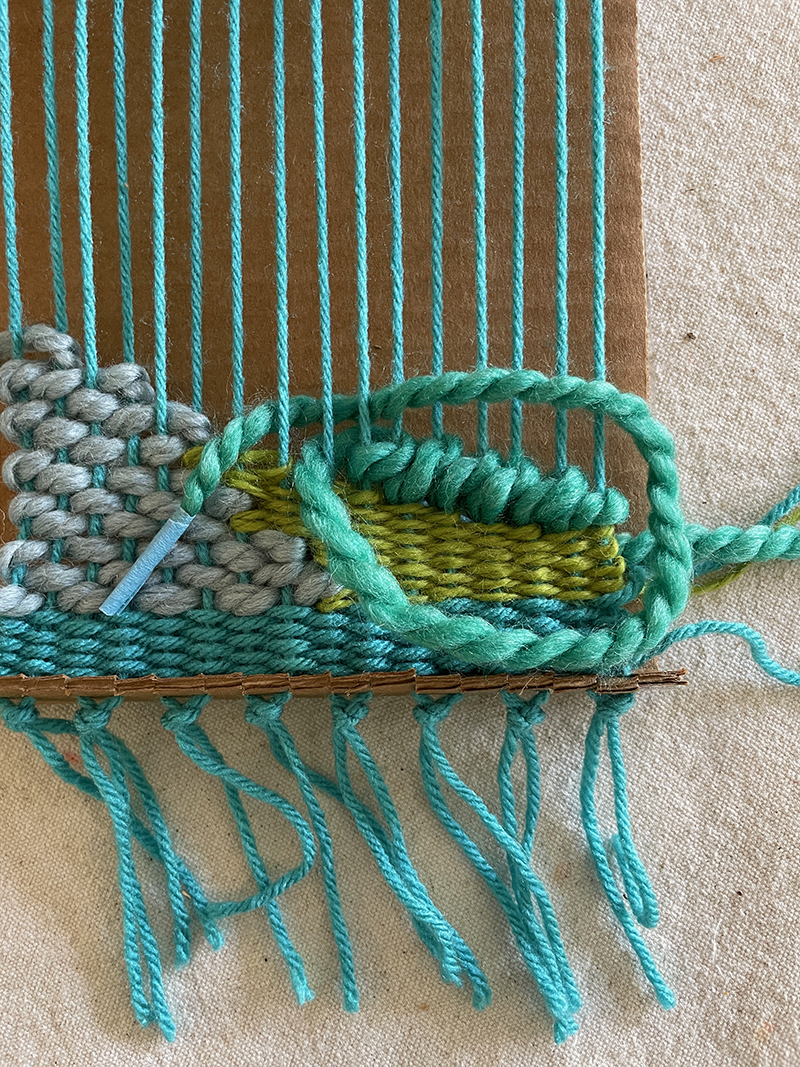
Stage 5: Try out some other types of weaves. I really don’t know what this is termed (below is a glossary of distinctive weaves if you are intrigued) but I just manufactured it up and it looked cool and intriguing. I like mixing puffy, thick yarn with thinner yarns. For me, the colour is as vital as the texture.
Remember, each time you start off or stop a new shade, go away a tail. You can even leave the tape on the conclude for the reason that you can use it later on to complete the again.
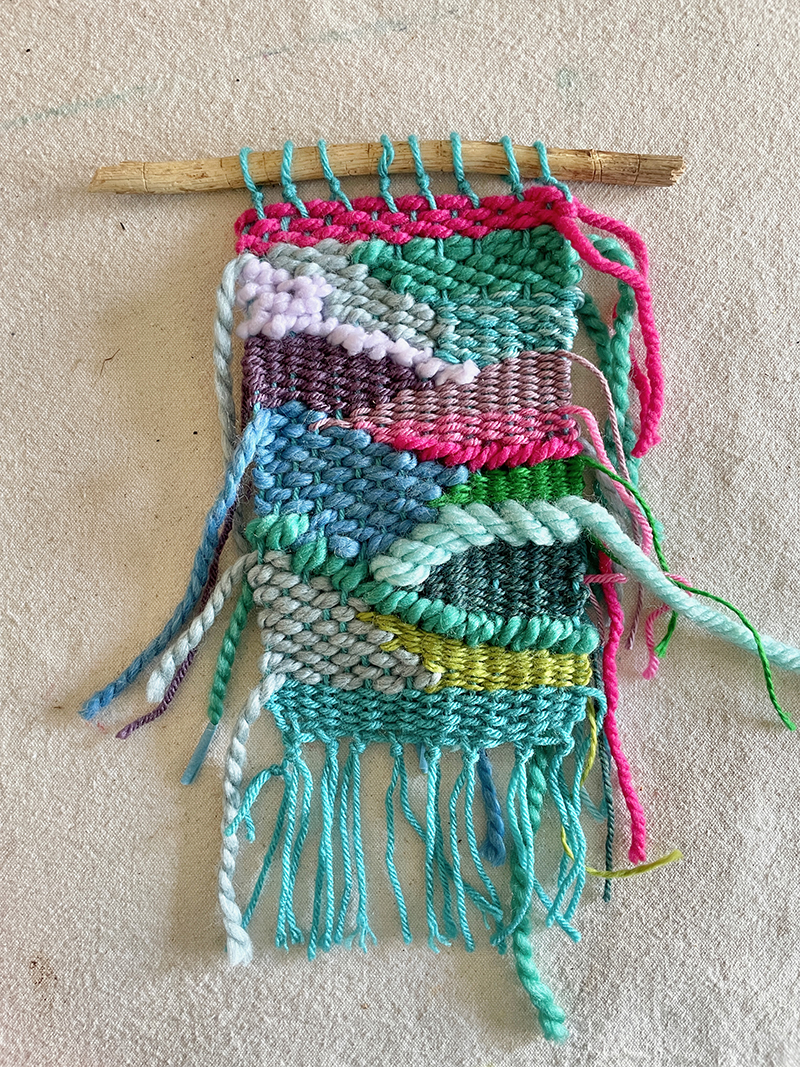
Action 6. When you get to the best, weave a few straight rows to complete. Diligently pop the warp yarns off of the loom. You will locate that there is a tiny more area at the top rated and base. You can both force the weft yarns all over a bit to fill the house, or weave a pair extra rows to fill the place.
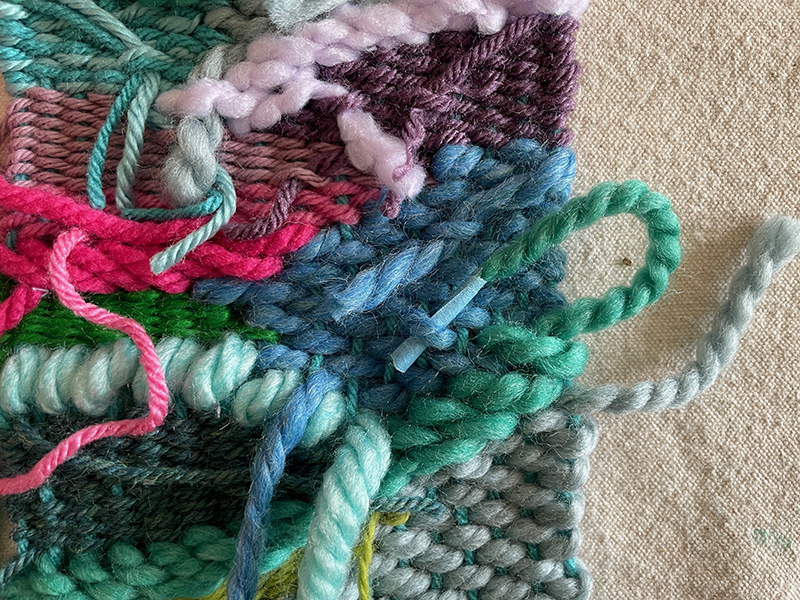
Action 7: Now it is time to end the back. Initial, make positive all the tails are looped by way of the remaining warp yarns at the ends. Then, flip your weaving more than and just start weaving the tails back via some of the warp or weft threads. You can both use the taped conclude, or use a boring pencil to pull up a loop somewhat, then tuck the tail beneath.
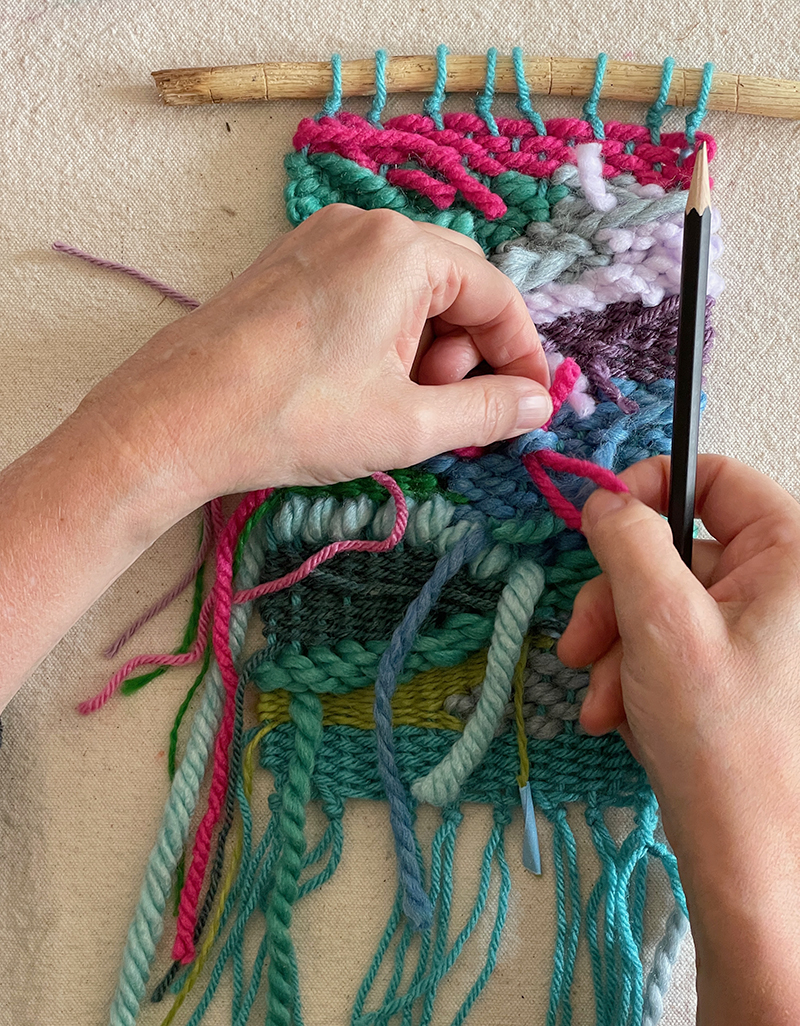
When all the tails are tucked in (you may well have to use masking tape from time to time if there is nowhere to tuck a little something), snip them to about an inch or so.
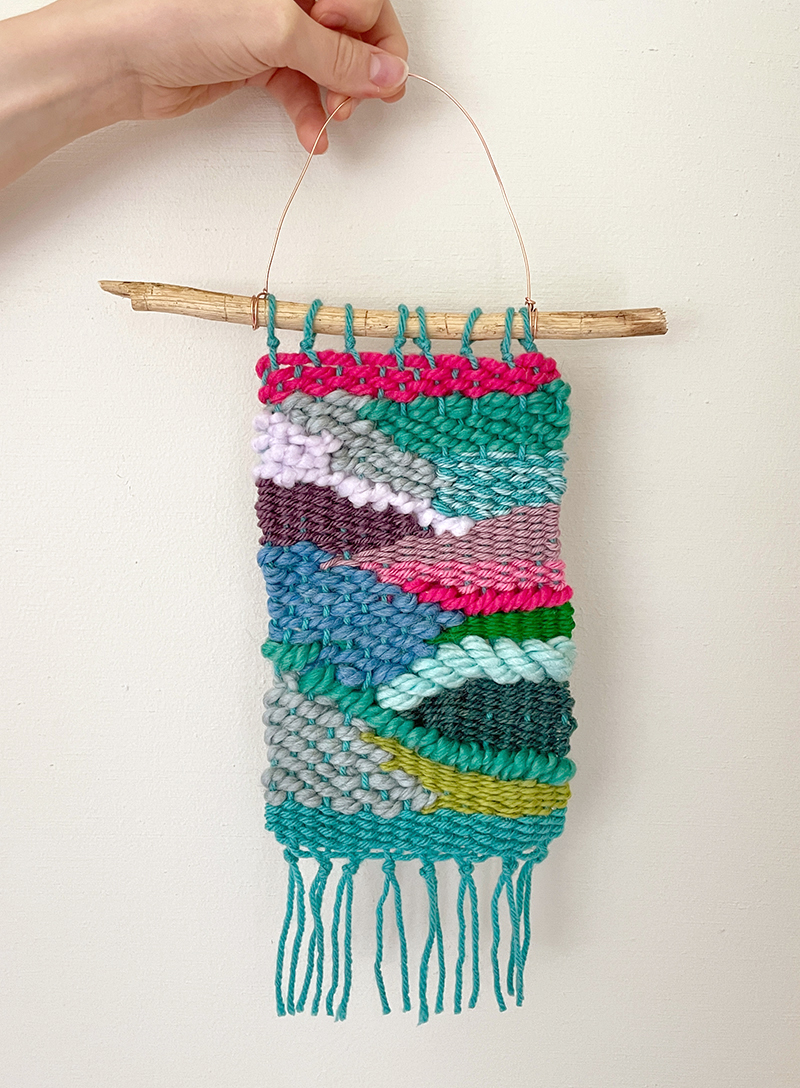
Phase 8: Trim the base, incorporate a wire hanger, and you are performed! I hope you appreciate your weaving and are pretty happy of it. I appreciate mine so a great deal and just can’t hold out to make additional!
xo, Bar
– – – – – – – – – – – – – – – – – – – –
Did you like this publish? Below are some extra imaginative tips employing fibers!
Weaving with Youngsters
Rainbow Weaving with Koolaid Dyed Yarn
Making God’s Eyes with Sticks


