


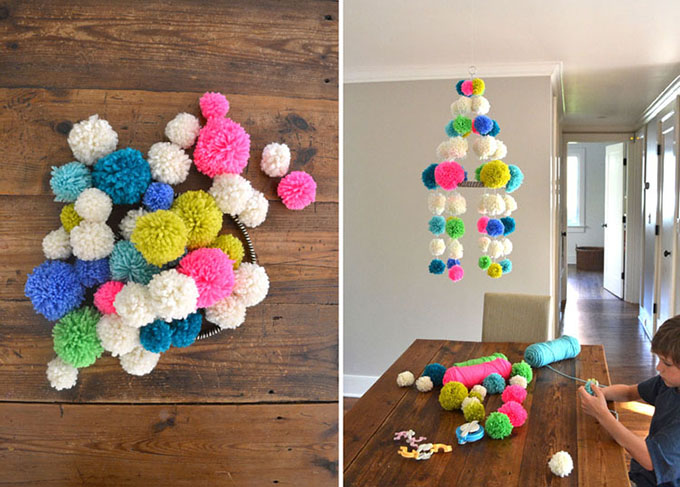
It is time to update this pom-pom chandelier put up from 9 years back, just one of the initially that went “viral” on my blog site in 2013. The purpose I wished to update this write-up in individual right now is since this chandelier was inspired by classic Polish chandeliers referred to as Pujaki (built from paper) and I seriously want to emphasize and honor the outstanding place of Poland and celebrate their people and their traditions. We are ending the next 7 days of Russia’s invasion of Ukraine, and Poland has now taken in excess of a million displaced Ukranians in a display of compassion and solidarity. This is how we increase to support others in require. I would like we would do a lot more of this when the refugees are Brown or Black, but I am hopeful that Poland’s act of generosity will spark equivalent steps to refugees of all hues in the upcoming.

In Poland, peasants employed to make these Pujakis for the duration of the winter months in planning for their biggest holiday break, Christmas! While traditionally created from paper and straw, mine was built from pom-poms since I am obsessed with these fluffy tiny guys.
Browse on to obtain out the elements I applied, and how I made this pom-pom chandelier.
Materials desired for Pom-pom Pujaki
~ Embroidery hoop (mine was 8″ diameter)
~ Ribbon to wrap all-around the hoop, I utilized black striped grosgrain (or depart it basic)
~ Yarn (I applied 6 hues but you can do just about anything you want) – this is the neon pink yarn I utilised
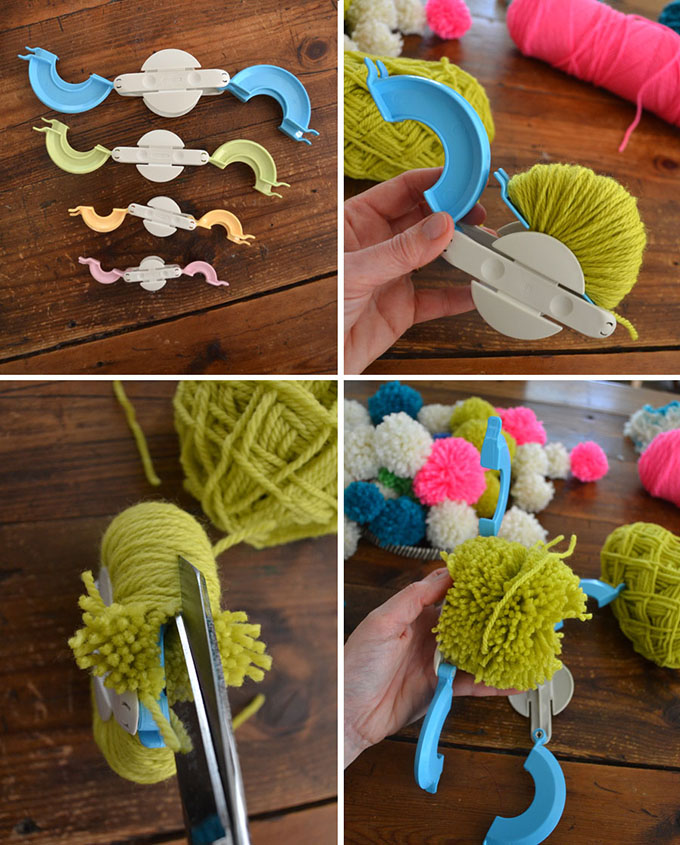
~ Pom-pom makers (optional, you can make pom-poms any way you generally do)
~ Superior scissors
~ Embroidery floss or thick yarn that can in good shape by way of the needle (I used a metallic string that was hard to perform with, I would not propose it)
How to make a Pom-pom Pujaki
This challenge is relatively of a challenge. I phone it a labor of really like. It just requires a very little time, and then a tiny engineering. Not at all tough, you just have to have time and endurance.
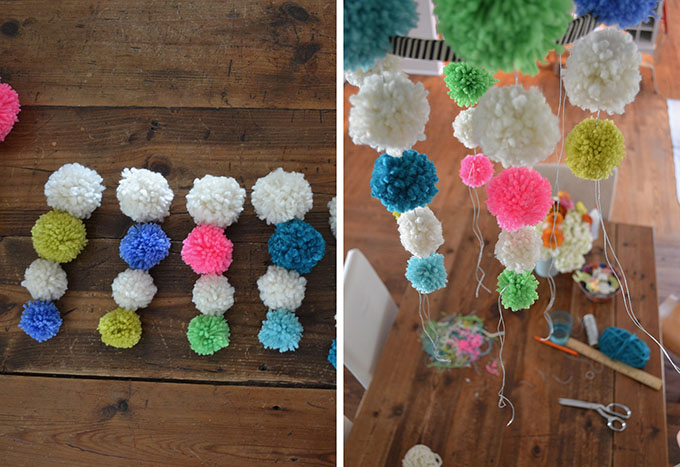
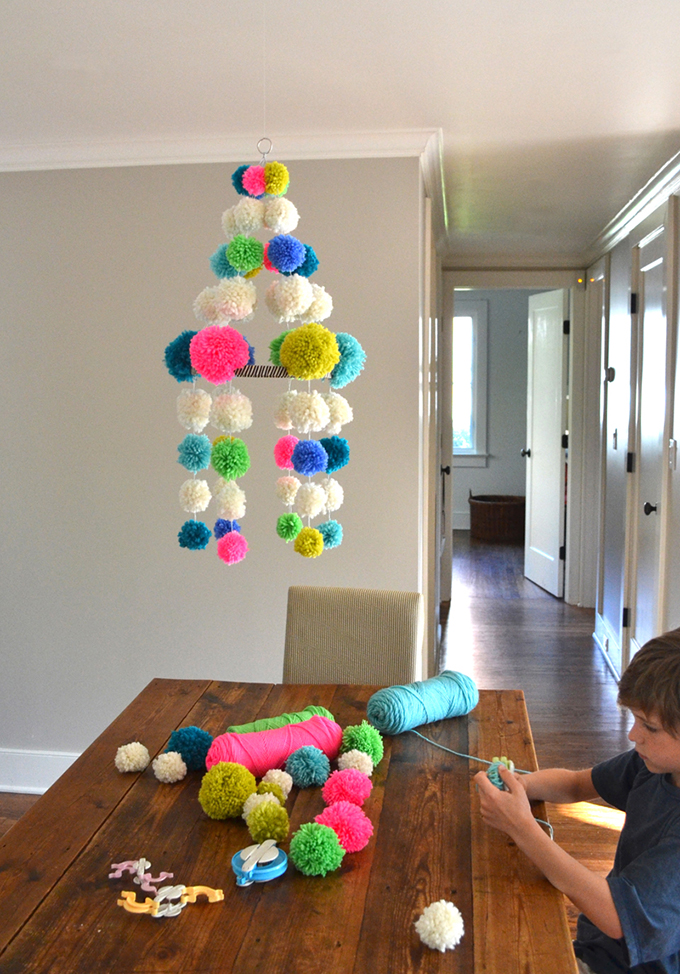
1. Make loads of pom-poms. I designed 54 for this chandelier in different measurements. I selected 6 distinctive shades and white (or more like product) to act as a rest for the eye. I made use of pom-pom makers which make issues definitely easy, but you can use whichever system you like. The pom-pom maker kit arrives with recommendations, but you get the notion from the pics.
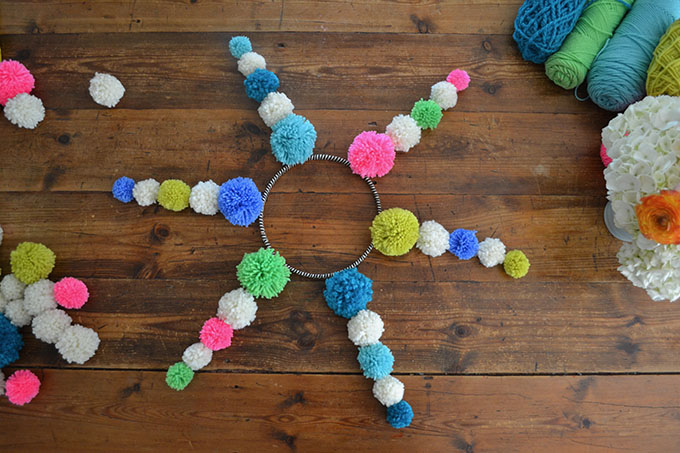
2. Next, lay out your pom-poms in the order that you like. I applied three distinct dimensions. I also measured and marked the hoop flippantly with a pen so I would know specifically exactly where to attach them.
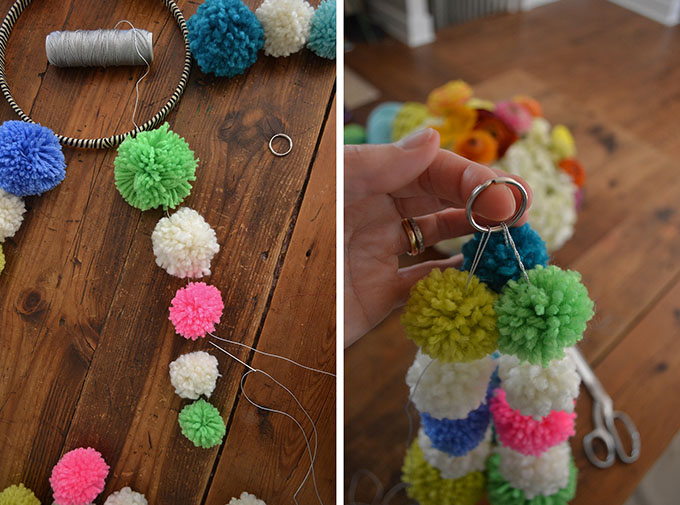
3. So far, pretty straightforward. But now arrives the challenging portion. Starting up with the major pom-pom, push your needle meticulously by means of each individual one. When you get to the smallest, loop the needle by way of the guide ring, and then back down all of the pom-poms. Leave a extensive tail at the conclude, about a foot. You will use this to attach to the hoop. Make certain that every single of the six strands is exactly the similar size. You can review just about every with the up coming as you go.
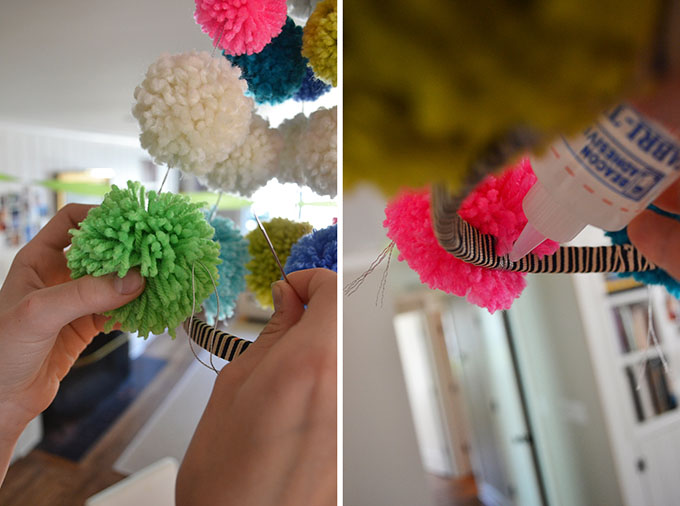
4. When all 6 strands are looped through the ring, hang the ring up on the ceiling. Now it’s time to attach the strands to the hoop. Re-thread the needle (now you will have two strings to thread). Wrap the string all over the hoop and then safe it by likely back by the pom-pom. Just after you truly feel that it’s restricted enough, trim the string. Subsequent, attach the strand reverse from the initial 1 you just did. The hoop ought to now be protected. Go ahead and connect all of them. I employed a small little bit of cloth glue on the inside of just to double secure the string.
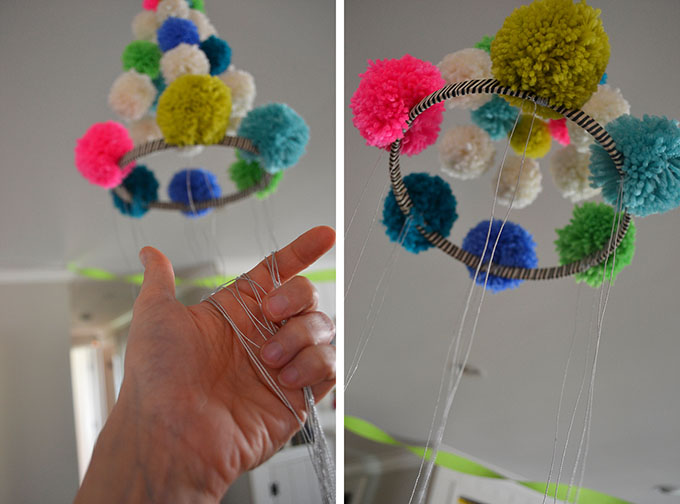
5. Now slice 6 items of string that are about 4 toes long. Just take the middle of every piece and loop it all over the hoop at the place where the 6 pom-poms meet the hoop. Make a couple knots. Now there ought to be six double strings hanging down.
6. Just one by 1, thread the two ends into the needle. All over again, force the needle thoroughly by way of the 4 dangling pom-poms. When you’ve arrived at the past a single, secure the thread by likely again as a result of the base pom-pom. Trim the string.
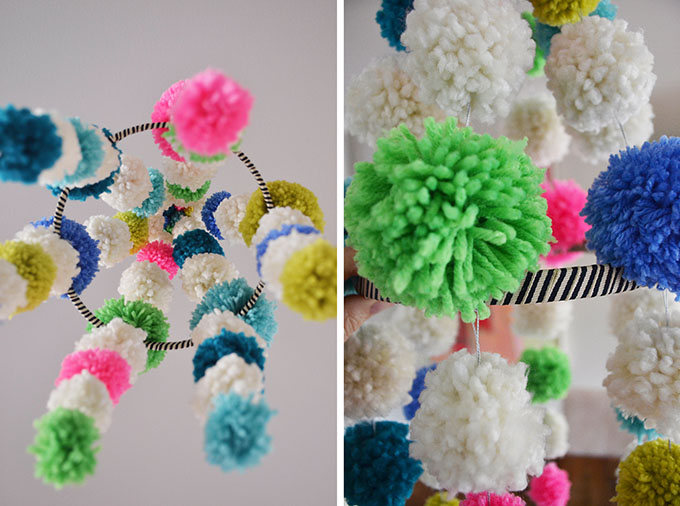
Now you are performed! There are most likely a lot of diverse techniques to get this finished, so if you come across a greater way, by all indicates do whatsoever you imagine is effective very best. This is just the way I did it.
I love our boho-chic Pujaki!
xo Bar
– – – – – – – – – – – – – – – – – – – –
Did you like this post? In this article are some additional concepts with pom-poms:
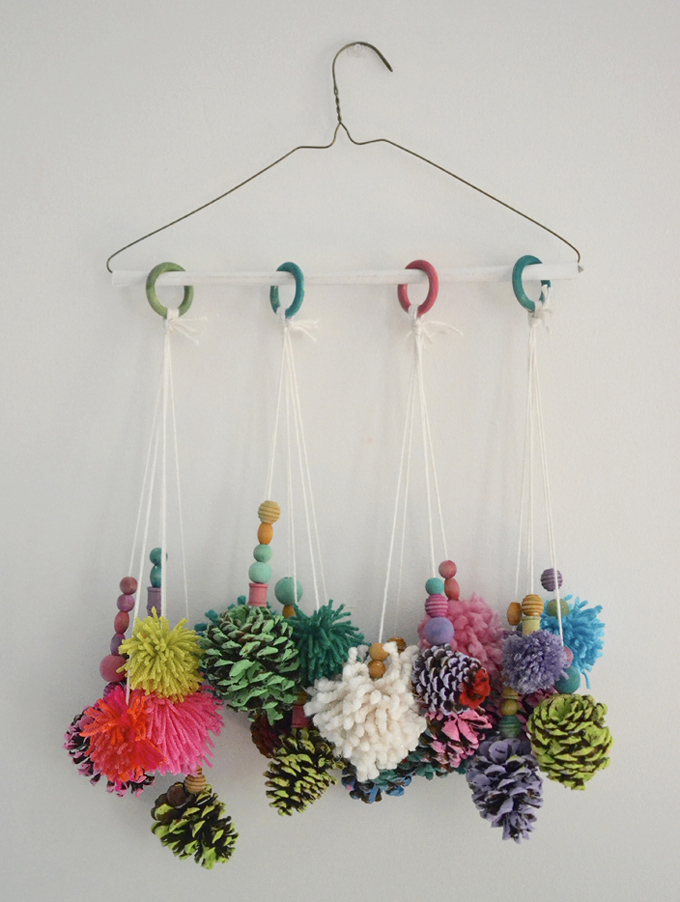
Pinecone Pom-pom Cell
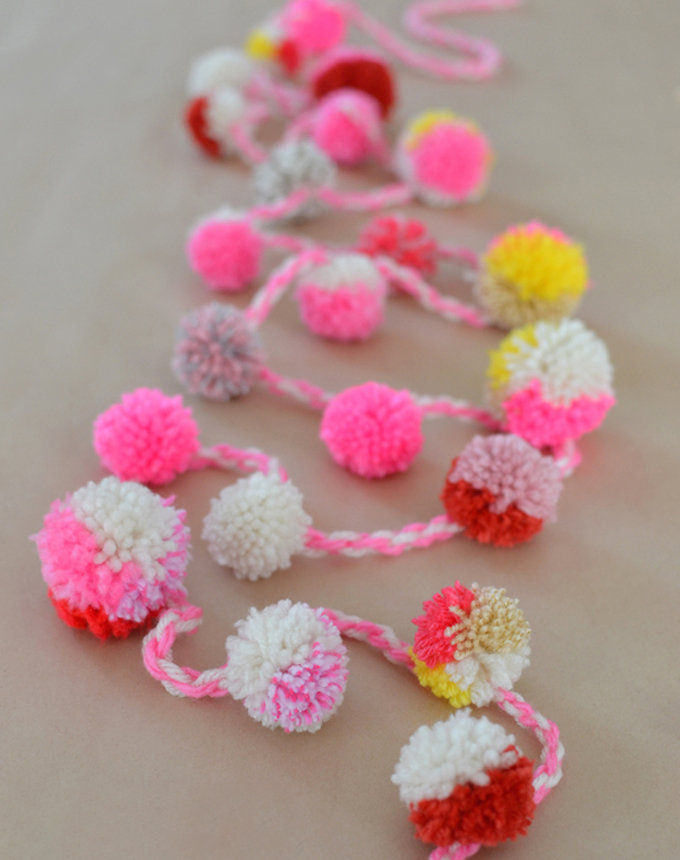
Pom-pom Garland
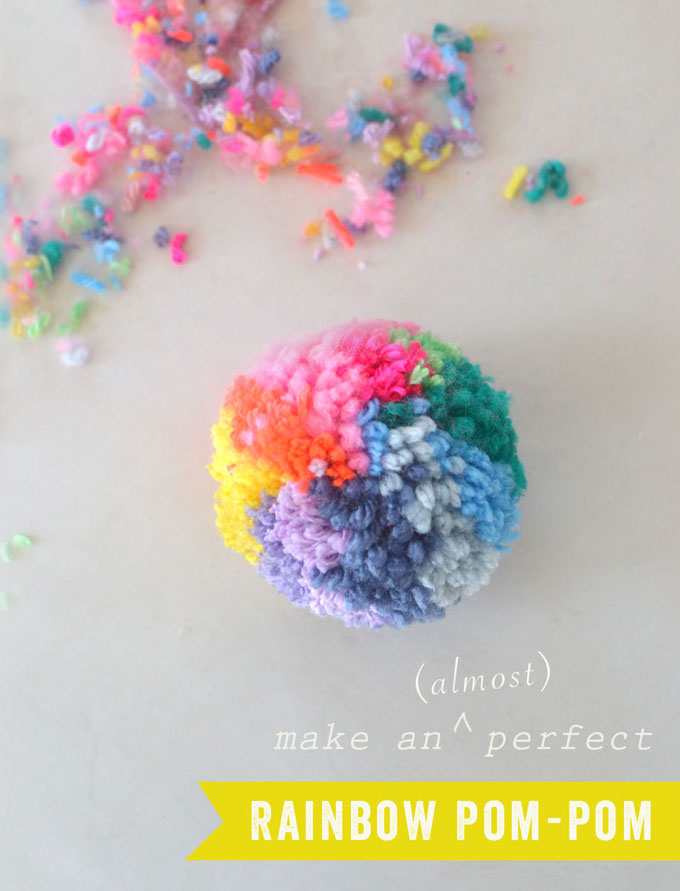
Make a Rainbow Pom-pom


